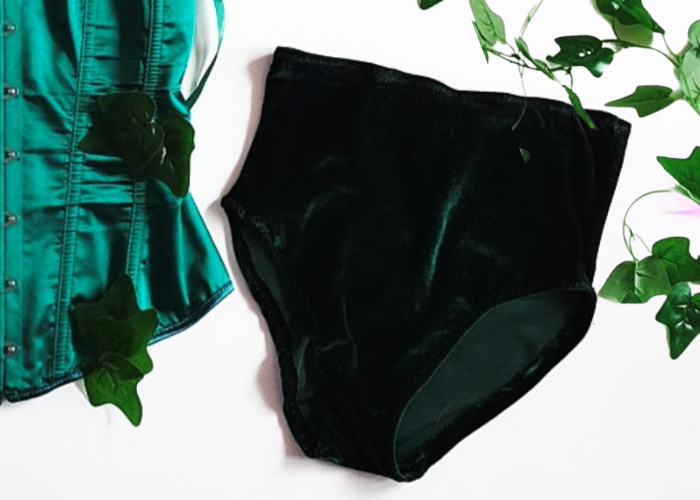
What do you do when you can't find the perfect dress-up costume? You make your own! In this tutorial, I will show you how to make a pair of high-waisted brief festival style pants that you can use for so many sewing projects. This project is to be used for a Poison Ivy dress-up party costume.
Damn right, affiliate links and adverts may be sprinkled throughout the amazing, free content you see below. I'll receive a small commission when you purchase from my links which is no extra cost to you, for more info please read my disclaimer and smile knowing you have helped support some cool free tutorials
How to Sew High Waisted Bikini Style Festival Pants.
High Waist bottoms are everywhere and have been for the last few years, Festival fashion made this modern hotpants style huge. It is hard to find a correct name for this style, some call them High Waisted Rave Bottoms or Bikini pants, others call them High Waist Bikini Bottoms and I have even seen fashion bloggers call them High Waisted Undies, even though they are technically not underwear. So call them what you like, it's all the same thing 😁
You can find this style in most online trendy fashion stores. The problem is they are never the perfect colour or pattern you want or the price is ridiculous, I am not paying $80 for some bikini pants! 😅 I found this was the case when looking for plain green high-waisted pants for a Poison Ivy Costume.
So I made my own and have created a basic tutorial on how you can too!
I will be using green stretch velvet to show you how to make the festival style bottoms but you can adjust this technique to make them look your own.
This basic high-waist bikini pant design can be used for today's latest trends, cosplay costumes, festival outfits and bikinis. This design works perfectly for
- Cosplay costumes
- Swimwear (just add a crotch panel)
- Briefs (add a crotch panel)
- Lingerie
- Dance costumes
- Festival clothing
- Disco Hotpants
- Roller Derby short shorts
- Summer Loungewear
It's all in how you use your fabric, print and colour which will make the complete look. Imagine making these in psychedelic print lycra!! Yes, please.
Make your own bottoms by learning how to sew this simple sewing fashion staple with the step-by-step instructions below.
TUTORIAL DETAILS
- Skill Level - Beginner to Medium
- Cost - From $10
- Time - 1 - 2 hours
Pants SUPPLIES
- The fabric of your choice - I used 2-way stretch velvet fabric for $19 per metre, half a metre purchased
- Sewing Machine with a zigzag stitch
- Elastic, approx 6 to 8mm wide
- Scissors, Sewing Pins
- Pair of swimwear or bikini briefs to make your pattern from
TIP: Use white elastic for lighter colour fabrics and black for dark colour fabrics
DIY FESTIVAL BIKINI BOTTOM SEWING INSTRUCTIONS
STEP 1
- Find a pair of well-fitting bikini or underwear bottoms that you already own and like the cut of the leg. Don't worry about the waist height, you can adjust that when making your pattern.
- Lay the paper down flat and trace around the front panel of your pants. Repeat for the back panel. Draw the waist height higher
- You should have 2 pattern pieces. The front panel is longer in the crotch and the back panel shorter
- Cut out your pattern
If you have two seams in the crotch, use the back crotch seam as your guide to know where to stop and start your pattern.
STEP 2
- Place your pattern onto your fabric, and use the folded line as your centre
- Pin and cut out leaving a 1cm allowance or whatever you feel comfortable with
- Add as much fabric to the top so it sits on your waist + the allowance. I needed to add 1.5 inches plus the 1cm. Only do this if you did not do it while creating your pattern
STEP 3
- Place your panels facing each other
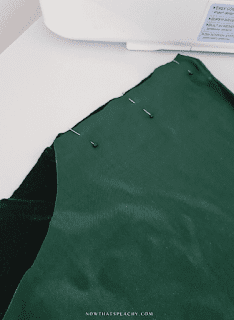
- Pin the side panels and crotch together
STEP 4
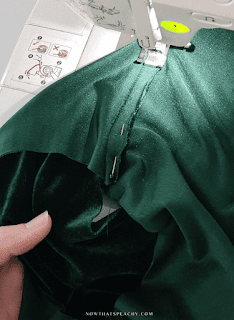
- Sew along the side seam. From the waist to the top of the leg opening in a straight stitch or with an overlocker if you have one. I used an overlocker but have made similar pants with a straight stitch before. Both ways work
- Sew the crotch section in a straight stitch
STEP 5
- Pin the crotch seam so it lays flat and faces backwards towards your back panel
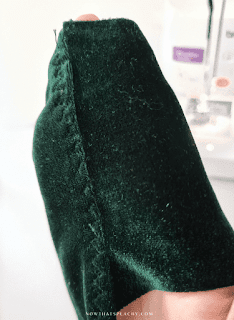
- Sew a wide zigzag stitch across the 3 layers of fabric
STEP 6
- Measure your elastic to fit each leg opening. Minus approx 10% for your final measurement. Some elastics are more stretchy than others so you may need to make it shorter.
- Sew the elastic into a loop and fold the edge of your leg opening over the elastic
- Sew a wide zigzag stitch along the edge neatly to secure your elastic
STEP 7
And it is as easy as that. You are finished
So now it's time to style them with a cool top and fashion accessories and show these babies off!
I made some matching over the elbow velvet gloves, fingerless and dance costume style. I girls gotta eat and still look good, no time to take gloves on and off when you are partying 😂 so fingerless it is.
I think adding the gloves, green corset, green boots and stockings made this Poison Ivy cosplay dress-up costume spectacular. I will do a separate post on how to make the rest of the costume so you will be all set to rock Halloween this year. Also to get a glimpse of what these pants look like when wearing them.
RELATED: LEARN TO SEW A BUMBAG FANNY PACK BAG
RELATED: HOW TO SEW A BALLOON SLEEVE TOP
RELATED: MAKE YOUR OWN LACE BRALETTE
RELATED: HOW TO SEW A FESTIVAL BIKINI TOP
I would love to see your DIY festival hot pant bottoms.
Tag me on social media @nowthatspeachy #nowthatspeachy so I can share them
What is your favourite dress-up costume you have worn?
Mine was an 80's Pageant outfit for a Murder Mystery game, I really should post about that!
Pin for later


