HOW TO MAKE AN ALICE CARD HEADBAND TUTORIAL DETAILS
Basic Craft skills
Approx cost $5
Approx time 10 mins
SUPPLIES TO MAKE A TWISTED ALICE HEADBAND
- Pack of cards
- Glitter foam
- Headband or Hair comb
- Craft glue
- Scissors
- clamp or clothes peg
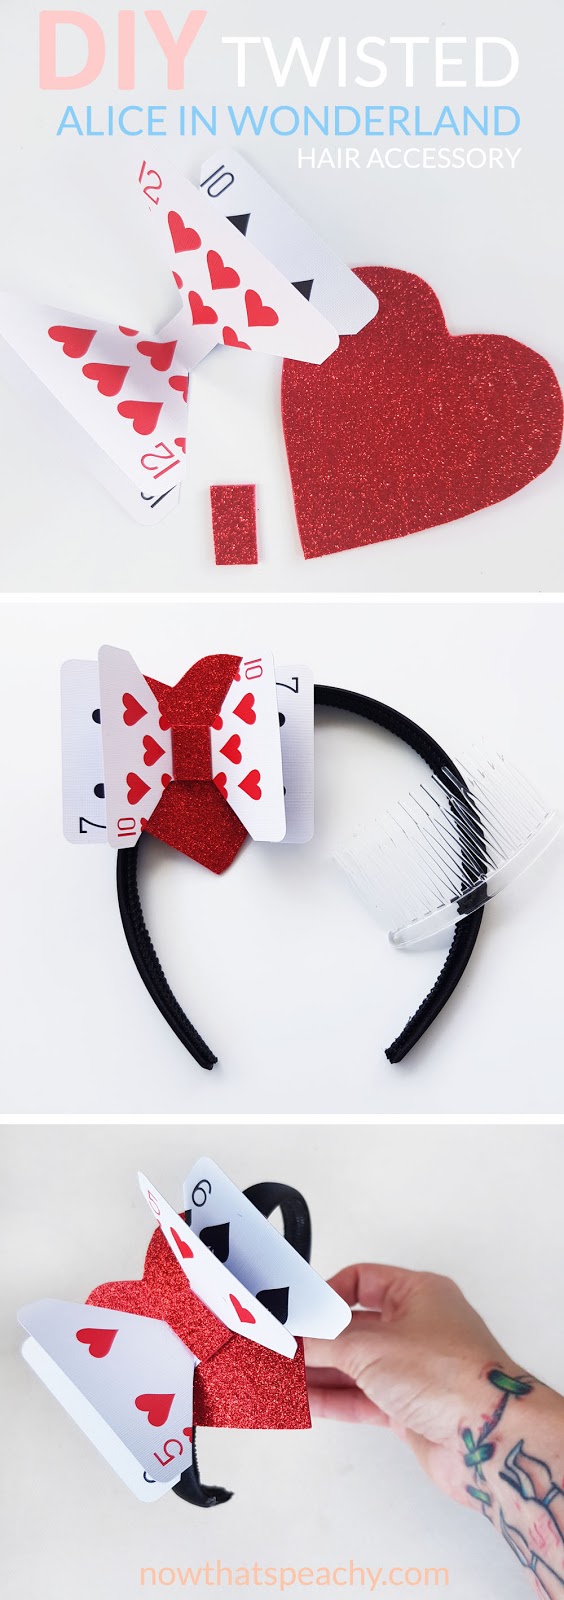
 This Alice in Wonderland-inspired headband has a little twist on the traditional Alice plain hair bow headband. I needed to make these headbands in bulk and to be attention-grabbing for dancers to perform in on stage. The dance was not a traditional Alice dance, it had some funk to it and lots of sass. So this heart card bow was just what was needed.
HOW TO MAKE YOUR TWISTED ALICE HEADBAND
Step 1With your red glitter foam cut out a heart. I used a plastic template but you could draw your heart on some paper to get the right size and then use that as your template.
Step 2
Cut 2 playing cards into a bow shape and fold upwards on each side in the centre of the bow. you can find the basic template for the card shape at the bottom of this post.
Step 3
Using your centre of the bow as a guide, cut one rectangle the same width as the card bow centre but a little longer for glueing
Step 4
Glue your 2 cards together to create a butterfly shape.
Now glue the back card in the centre of the heart.
Glue the red foam rectangle over the centre of the playing card bow.
Place a peg or clip over the centre to keep together and dry.
I use fast-drying strong craft glue, so this takes a few mins to dry. If you are not sure how long your glue will take to dry, keep checking it or use a hot glue gun.
Step 5
Choose your desired headpiece and glue your heart onto it.
I was going to use hair combs but remembered this did not match the dancer's hairstyle and may not stay in so I used black headbands which looked fabulous.
You can use your clip again while the glue dries.
To complete the twisted Alice look and give the dance costumes some sparkle, I cut more hearts and glued them to the front of the apron on the dress. Very cute and the kids loved it. This design would be wonderful for any costume party, school book parade or Halloween event.
Happy Crafting
Pin for later


