

I had the task of making a PJ Masks Owlette costume for a Shopping Centre Dance School registration for the younger kids to get excited and meet a superhero! But then I had a migraine for a week so had no time to do this magnificent costume I had planned in my head 😊
I had one hour before work on a Friday afternoon the day before the event to make the wings....... I can do this I told myself and somehow I did 😄 I had already brought the Mask, leggings and a Red Tutu so only needed the big wings.
I have redone this tutorial for you all because I was so impressed by how the cape/wings tuned out without sewing the pattern onto the wings

This may be the easiest dress-up wings for you to make
DESIGN, CUT, GLUE

TUTORIAL DETAILS
Basic sewing skills
Approx cost $10
Approx time 1 hour
Supplies to make your own PJ Masks Superhero Wings
- Red Lycra fabric
- Holographic stiff fabric
- Paper and pen to draw the pattern
- Scissors
- Craft glue suitable for fabric
- Measuring tape & pins
- Sewing machine for Method 2 tutorial
These wings are not sewn around the edges and you are only gluing the wing pattern design, so I recommend you use a non-fray fabric like I have used below.

STEP 1
Design the wing pattern on a piece of paper. I have included my design below but you could easily simplify it more. I looked up Owlettes wings on google images and copied from there. At the bottom of this post, there is a free pattern printable for you to go off.

STEP 2
Fold the fabric in half, mark your design on the unfolded edge and cut out the design.
You need your width to be from the end of the middle finger to the other, I will explain why later. You also need to mark with a marker where your wrist is for step 7.

STEP 3
Start drawing and cutting out the wing pattern on paper or newspaper, placing them on the fabric wings as you go to make sure they all fit together.
STEP 4
Put your paper cutouts on your holographic fabric and cut. I traced around and cut inside the texter marks so I could mark and cut all at once, instead of piece by piece.
STEP 5
Pin your panel pieces on the wings in the correct spot.
STEP 6
Select a one-panel piece, unpin and on the backside glue around the edges and place back onto the area you unpinned from. Repeat on all the pieces.

STEP 7
Here are 2 methods to attach the wings to the arms
Method 1
NO SEW Tie design
Cut little holes across the top of the wings in a straight line, you need at least 3 holes per arm. One at the wrist, one and the elbow and one at the underarm. You can cut as many holes as you like if you want more security.
Cut long strips of lycra and place them in holes. Tie around your arms.

Method 2
BASIC SEWING Tube design
Measure arm lengths and underarm width
Fold the fabric in half and cut 2 rectangular panels. These should measure long ways the length of the arm and width of the arm. Add 1 cm or more for the hem and movement.
Pin to the top edge of the wings and sew a straight line to make a tube to slide arms in. You need to measure where the wrist is to start sewing there. If you marked the wrist in Step 1, you do not need to redo it.


STEP 8
Cut a small hole where the middle finger ends so you can slide the finger in and have wings more secure and it just looks better 😊

STEP 9
Front chest logo
Print & Cut my PJ MASK LOGO template below. Print on an A4 sheet. This is for an adult size, so if you need to make it smaller, print approx at 50% for a toddler and 75% for an older child.
Place logo template on your pink fabric, pin and cut the design out
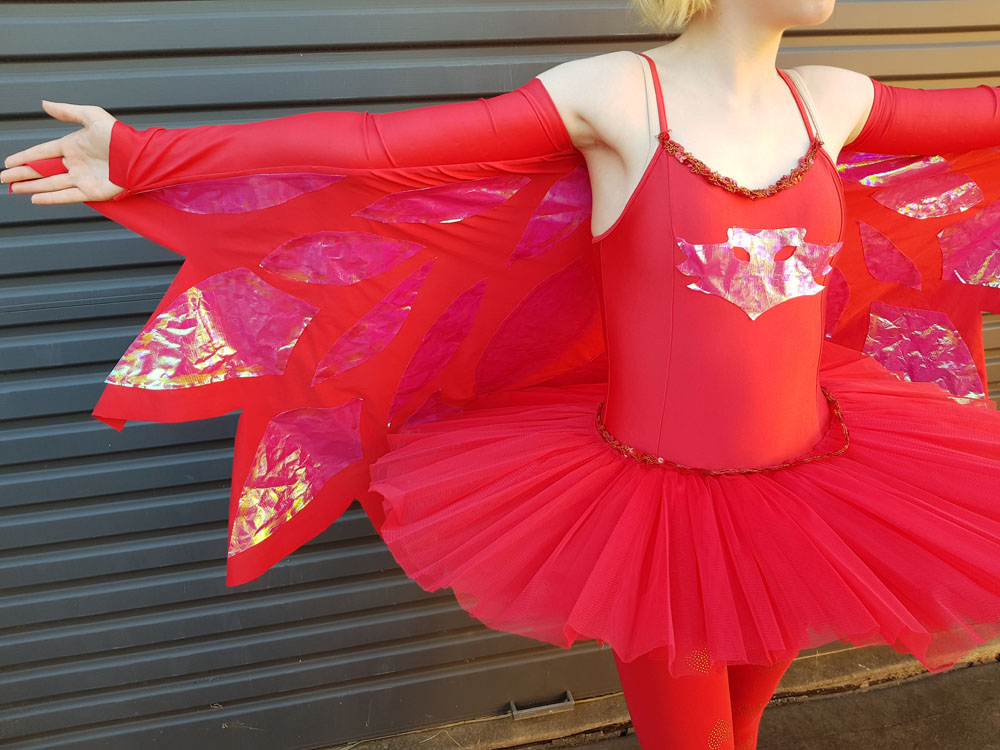
Glue or hand sew on the front of the chest panel of your red top/tutu/dress. I hand stitched because I did not want this permanently on as I used my daughter Ballet Dance Tutu she uses for performances.


I added the official Disney Jr PJ MASKS mask with some red tights, red Converse shoes and the red tutu to complete Owlette.
You could use any red dress and legging for this outfit and it would be super cute. I purchased the leggings from Best & Less and the Mask from Big W in Australia. I do love how this Owlette ballerina turned out though, a fun twist on the traditional dress-up outfit and perfect for a dance school costume.


STEP 3
Start drawing and cutting out the wing pattern on paper or newspaper, placing them on the fabric wings as you go to make sure they all fit together.
STEP 4
Put your paper cutouts on your holographic fabric and cut. I traced around and cut inside the texter marks so I could mark and cut all at once, instead of piece by piece.
STEP 5
Pin your panel pieces on the wings in the correct spot.
STEP 6
Select a one-panel piece, unpin and on the backside glue around the edges and place back onto the area you unpinned from. Repeat on all the pieces.

STEP 7
Here are 2 methods to attach the wings to the arms
Method 1
NO SEW Tie design
Cut little holes across the top of the wings in a straight line, you need at least 3 holes per arm. One at the wrist, one and the elbow and one at the underarm. You can cut as many holes as you like if you want more security.
Cut long strips of lycra and place them in holes. Tie around your arms.

Method 2
BASIC SEWING Tube design
Measure arm lengths and underarm width
Fold the fabric in half and cut 2 rectangular panels. These should measure long ways the length of the arm and width of the arm. Add 1 cm or more for the hem and movement.
Pin to the top edge of the wings and sew a straight line to make a tube to slide arms in. You need to measure where the wrist is to start sewing there. If you marked the wrist in Step 1, you do not need to redo it.


STEP 8
Cut a small hole where the middle finger ends so you can slide the finger in and have wings more secure and it just looks better 😊

STEP 9
Front chest logo
Print & Cut my PJ MASK LOGO template below. Print on an A4 sheet. This is for an adult size, so if you need to make it smaller, print approx at 50% for a toddler and 75% for an older child.
Place logo template on your pink fabric, pin and cut the design out
Glue or hand sew on the front of the chest panel of your red top/tutu/dress. I hand stitched because I did not want this permanently on as I used my daughter Ballet Dance Tutu she uses for performances.


I added the official Disney Jr PJ MASKS mask with some red tights, red Converse shoes and the red tutu to complete Owlette.
You could use any red dress and legging for this outfit and it would be super cute. I purchased the leggings from Best & Less and the Mask from Big W in Australia. I do love how this Owlette ballerina turned out though, a fun twist on the traditional dress-up outfit and perfect for a dance school costume.


I hope you enjoy making your own cartoon PJ Masks Owlette wings. This pattern is so versatile though, that you can alter to suit lots of superheroes, fairies or animal dress-up Costumes.
If you have any questions, please feel free to ask me in the comments below
If you have any questions, please feel free to ask me in the comments below
Happy Sewing!
FREE DESIGN PJ MASKS DESIGN PRINTABLES
Print on A4 size paper, right-click to save


pin for later

