

Bleaching old Jeans at the moment is huge!!! You would have seen the half bleached one leg trend currently on Tik Tok and some influencers wearing the Two-Tone look. You can create lots of different designs or patterns which makes experimenting with bleach & jeans very rewarding.
Before you donate all your unwanted clothes to charity while you are doing your Quarantine wardrobe clean out, grab some jeans and get creative!
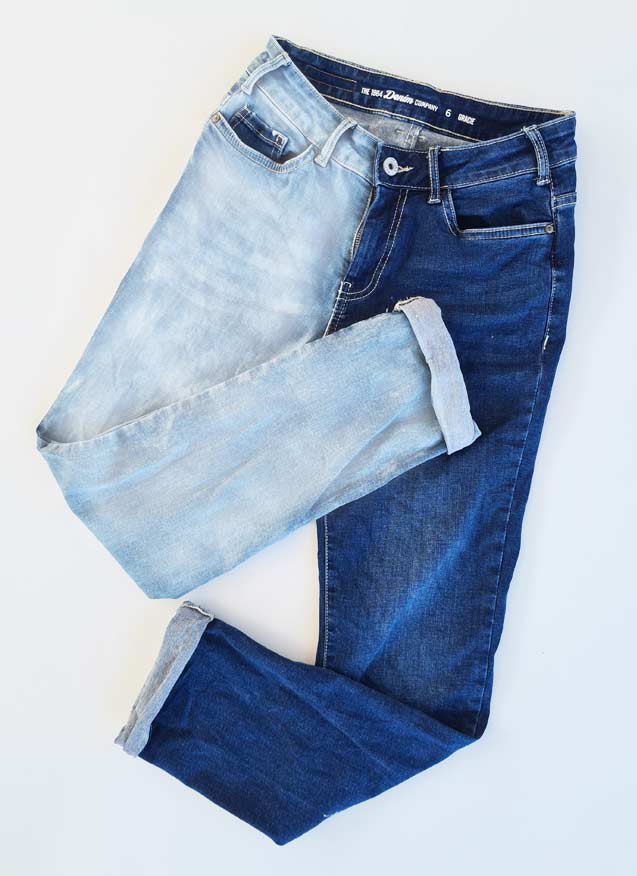
The most popular trend with young people at the moment is the '90s half-leg look. One leg is fully bleached (with or without the pockets) and the other leg with the opposite pocket is bleached.LEARN THE BEST WAY TO BLEACH YOUR JEANS
This tutorial will show you how to create this denim bleached style but the technique can be used with any bleached look. You can find past tutorials on how to make patterns on jeans HERE & HERE. Those DIY patterns are not currently on-trend, but with some imagination, you can use those techniques to create your own bleach patterns.
How to bleach your jeans Instructions


DIY Supplies

- Old Jeans
- Bleach
- Gloves, Mask & old clothes
- Ventilated outdoor space
- Plastic for the flooring ($1 party tablecloth or paint drop sheet etc)
- A spray bottle
- Tape or Plastic book cover
If you are under 13 years old, I recommend you ask an adult to do this DIY and help with the harsh chemicals
CUSTOM BLEACHING YOUR JEANS DIY
TutorialFind a design you would like to try. Once you have the style, mark off any sections you do not want the bleach to go with tape, plastic book contact or large sections use plastic garbage bags taped.
To create the half-one-leg Jean Tik Tok fashion style, tape around the crotch seam from the top waistline to the crotch on both front and back.


Because the crotch is a curve, do not use one piece of tape to go around the seam. You need to tape the seam in sections so you have no gaps under the tape when you are curving it. Start from the top and once you get to the curve, tape past the curve not following the angle and cut, Then start taping again with the right angle and overlapping the previous tape. Repeat all the way around
To protect the pockets, tape around the whole pocket and place a plastic bag inside the jeans to prevent the bleach from seeping through to the front panel.
When taping the opposite back pocket, you can tape over the bottom of the pocket and then trim with scissors. This way the seam is covered perfectly and protected from the bleach. Tape over the edges to protect the top of the pocket.


When taping the front, you can tape the coin pocket if you would like more contrast.


Once taped, you can tape the leg into a plastic bag & place a plastic bag inside the jeans before you spray the bleach.


Place the Denim Jeans flat on the ground in an outdoor space that is well-ventilated. Make sure you have a tarp or plastic covering any pavers, decking etc so no bleach ruins the outdoor flooring.
Put on gloves, old clothes and a mask.


In a spray bottle with 100% Bleach, spray the bleach directly onto the jeans, until they are wet. Leave the bleach on for as long as you like. 1 hour will make a slightly lighter shade, it could take hours to pull most of the jean colour out making it nearly white in the sprayed areas. Keep an eye on the jeans and keep checking. Rince when the desired colour is achieved.


Rinse under cold water & then wash your jeans in the washing machine. Let the jeans dry before wearing them.
Always wear gloves when working with bleach & write on the bottle with a texter "BLEACH" so no one will ever use the bottle for non-bleach use. Store in a high or locked cupboard away from children's hands
Bleach is a dangerous chemical, so work in a well-ventilated space while protecting your skin and eyes. DO NOT spray bleach when windy and dry outside in the sun
Remember when bleaching black fabrics, the end result will go a rust-orange colour, not white. Standard Blue jeans will go to white.
For inspiration, you can look here

HAPPY CREATING!!!
Stay safe & smiling
Pin for later

You may also like these DIYs


The tape is a great idea! When I saw the photo I pictured unpicking then re-sewing it all back together - this is much easier.
ReplyDelete